
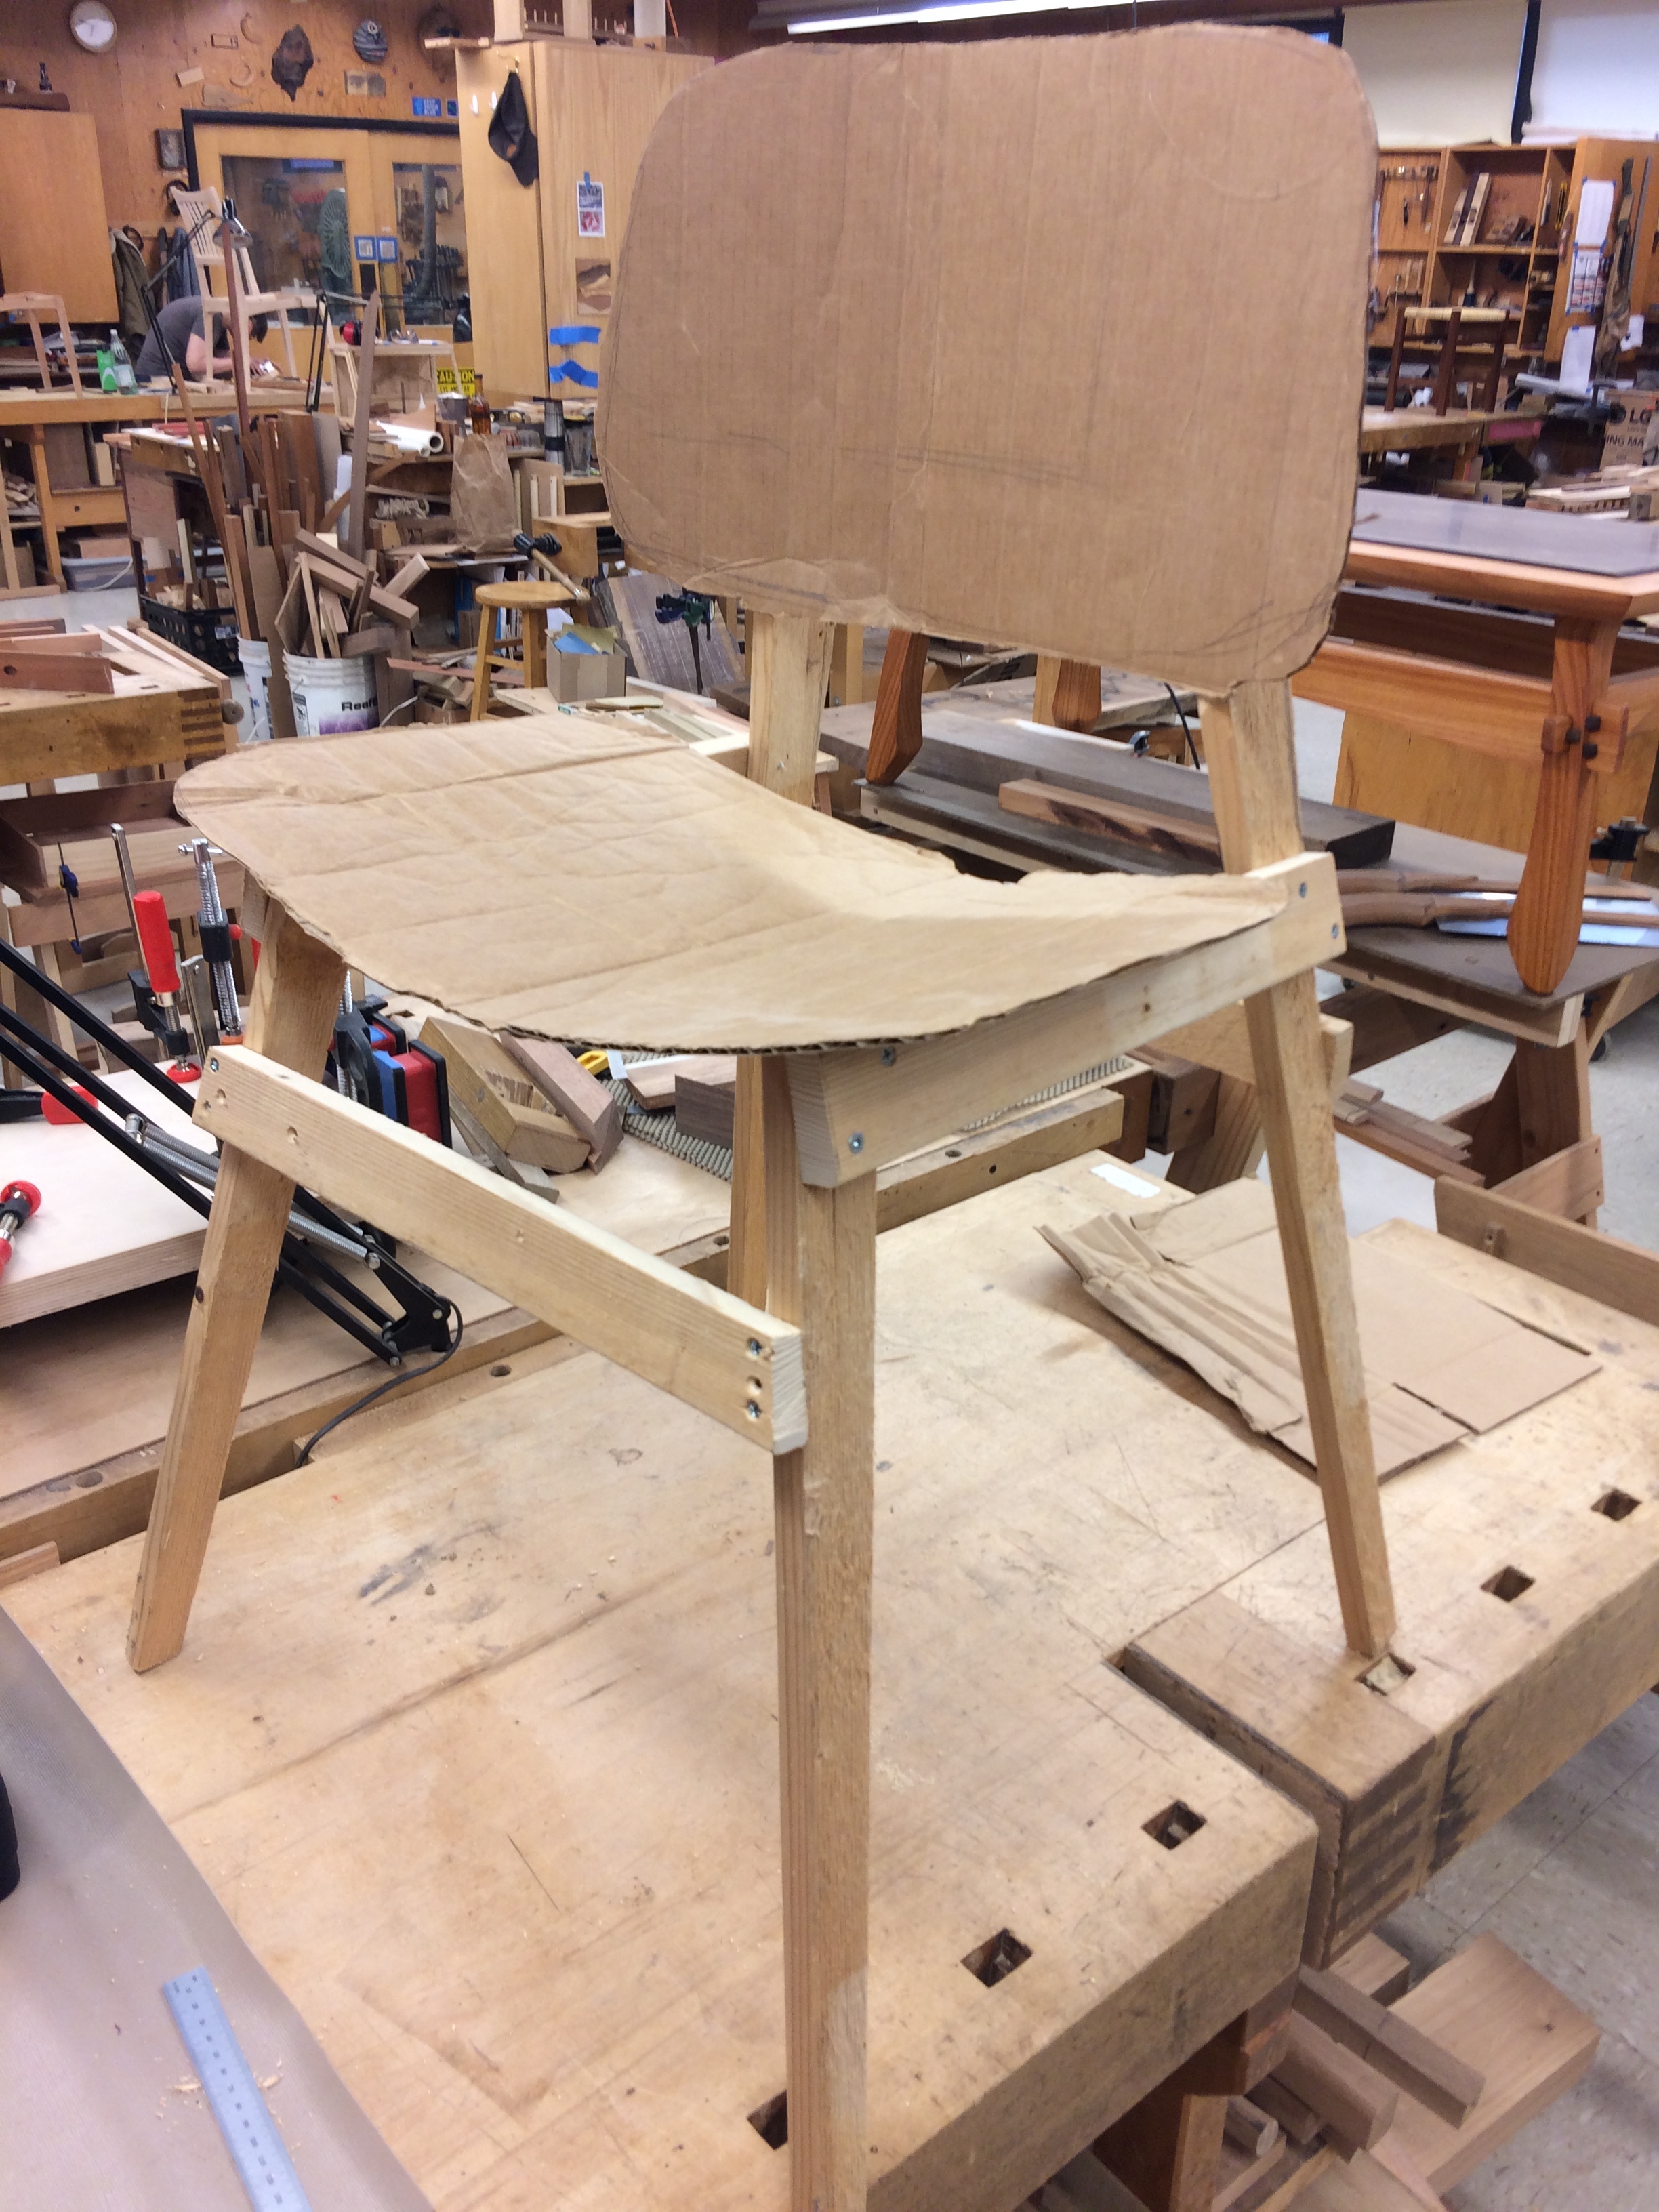
I tuned up the mock-up to better represent the actual design.
Tapered Planing Sled

In order to uniformly taper all of the legs, I made this sloped sled to carry the legs through the thickness planer.
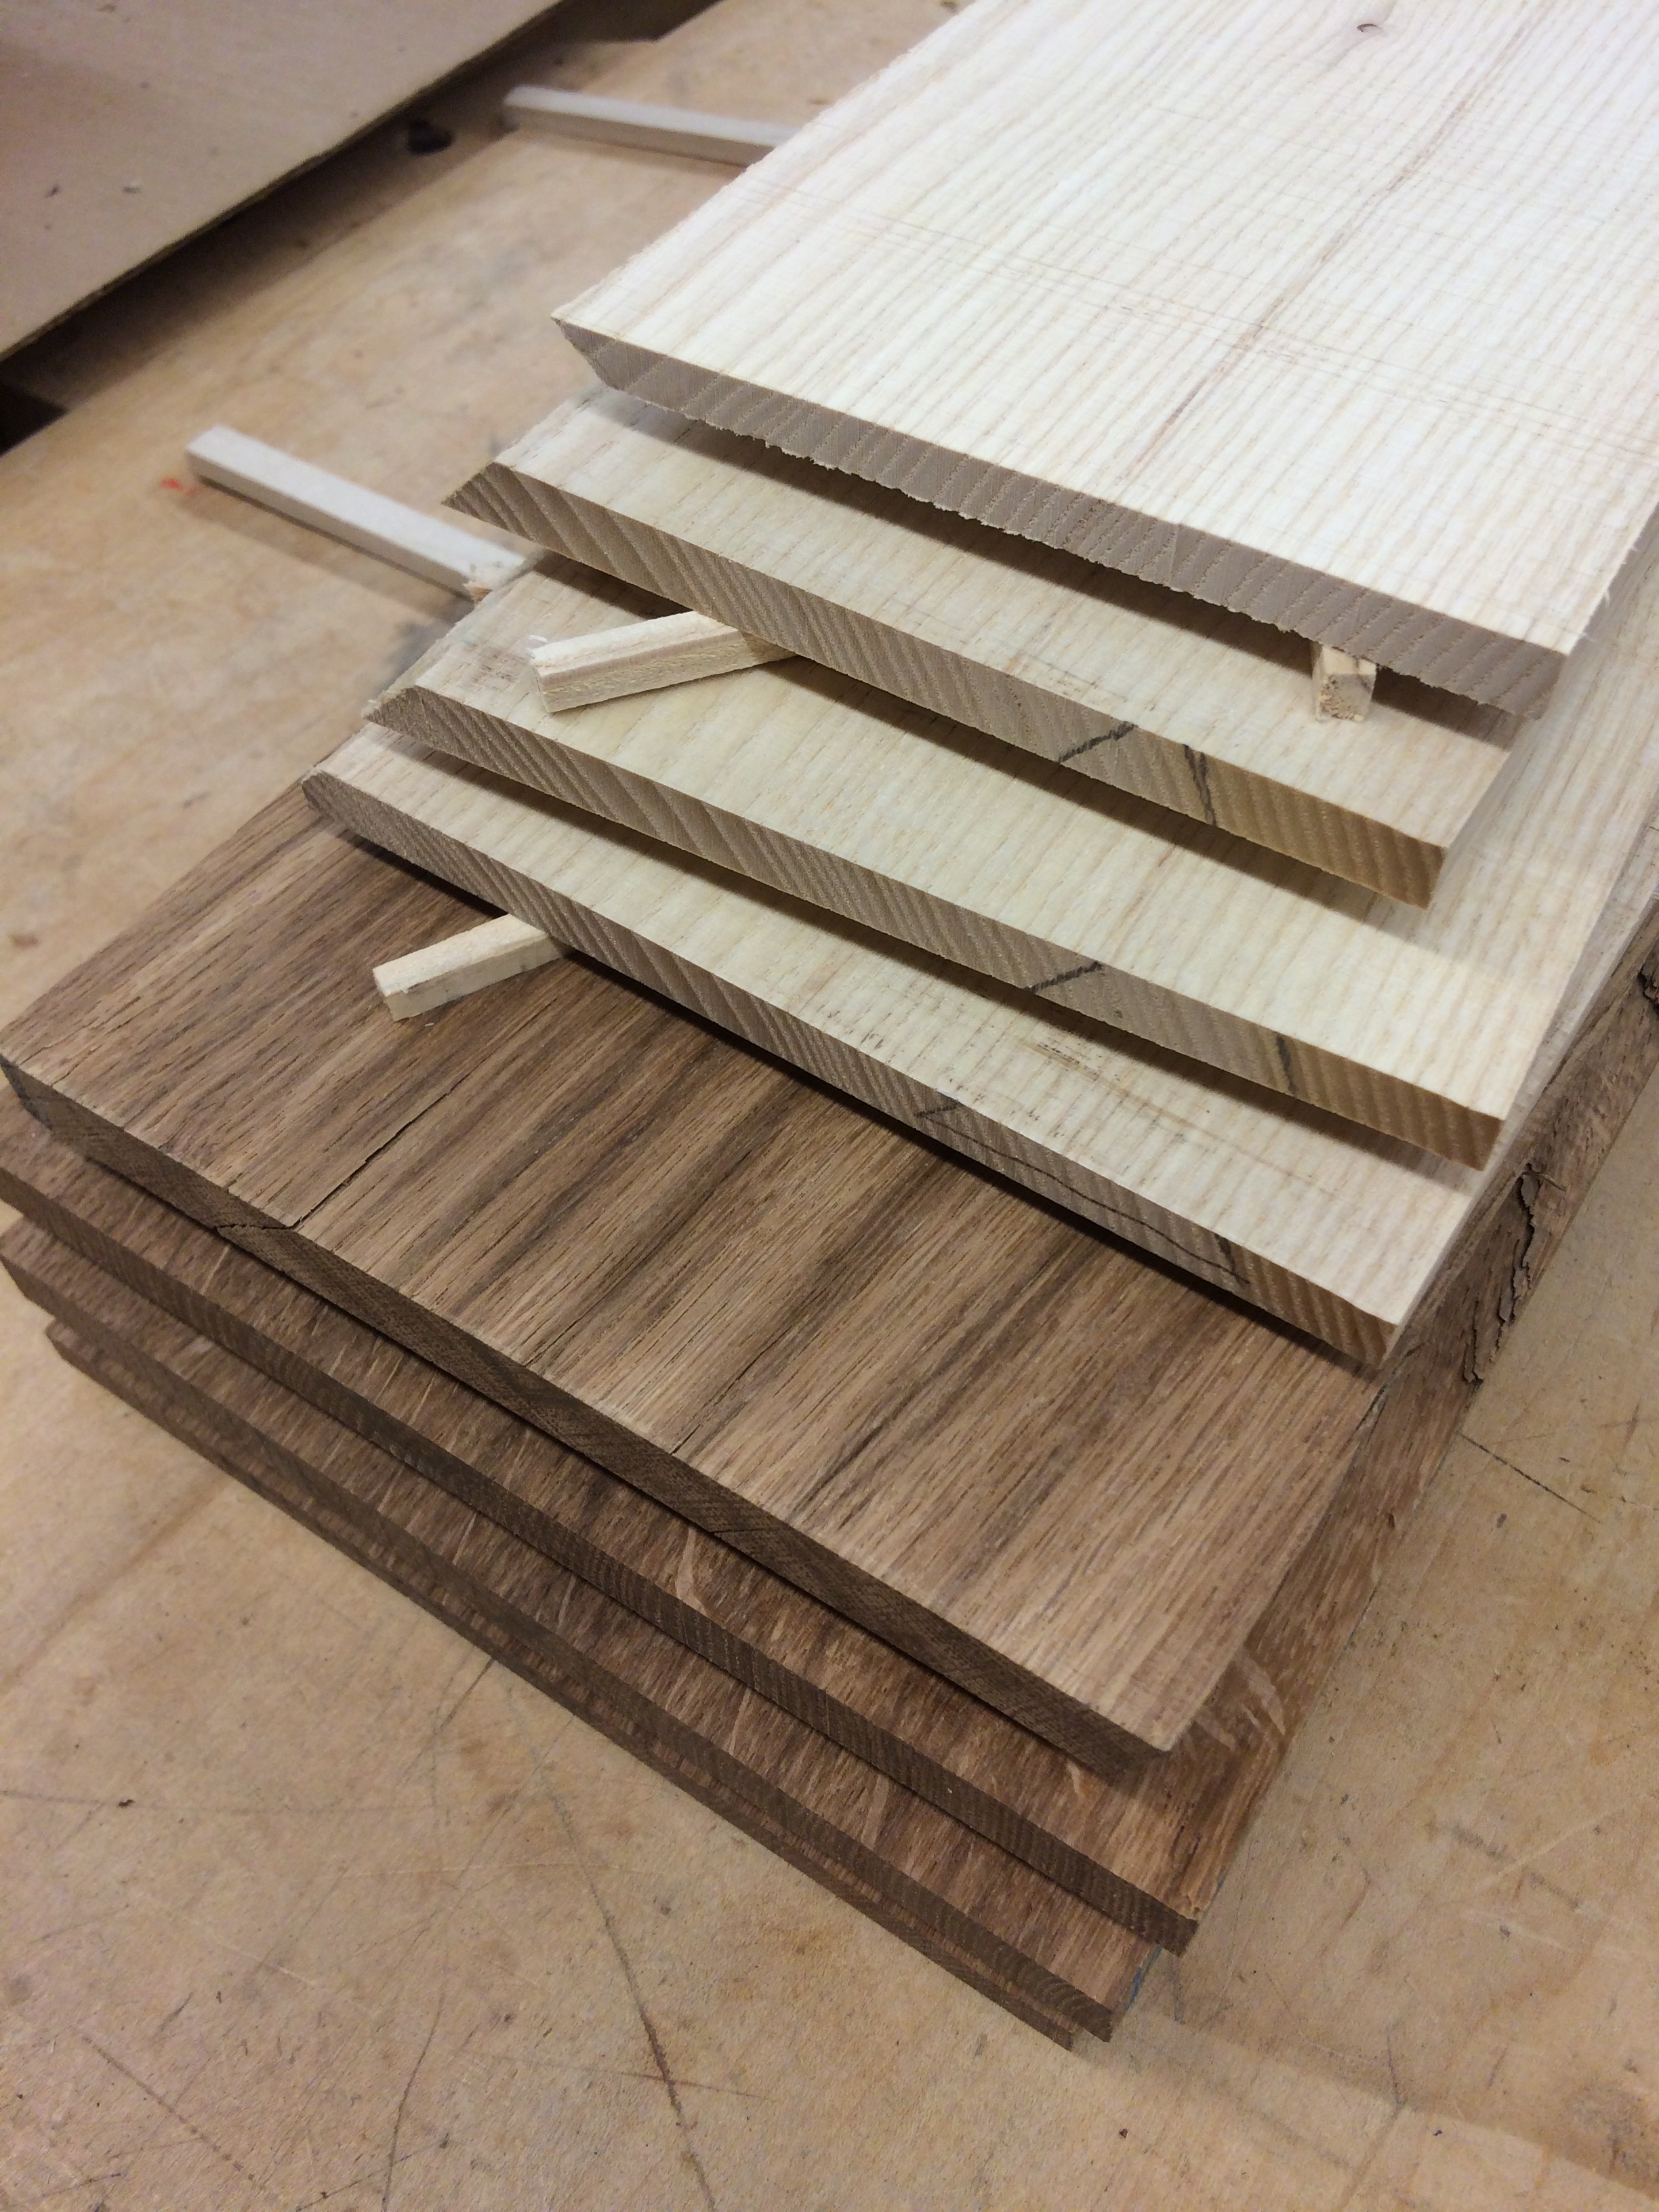
Søborg Chair: Wood and Patterns

With patterns printed, glued to hardboard, and cut out, I now lay out the pieces on a plank of white oak. Having used brown oak, black oak, and tan oak in my previous projects, it seems like a logical choice to build this project with the remaining species of oak in the building.

Pieces are rough sawn and stickered as I allow the internal stresses to relieve and wait for any warping or twisting to happen before working them further.
Plans and Improvements

I found the plans at the manufacturer's website which will help me better understand Mogensen's design.

While close, it is obvious now that the angles in my initial mockup are off.
Third Project: Søborg Chair
For my final project of the year, I wanted to design and build a Scandinavian-inspired lounge chair. However, given that there are less than seven weeks remaining, that is an overly ambitious goal. Instead, I will make a pair of Børge Mogensen's classic Søborg Chair. This chair, designed in 1950, is still being made in Denmark by Fredericia Furniture A/S.
A quick mock-up of the chair based on images I found in books and online.
Second Project: Complete
This wall cabinet is a literal and figurative expression of a student's audaciousness to attempt new things. My desire to push the limits of my skills as a woodworker is mirrored here by the the protruding features, reaching beyond the safety of the central enclosure.
The brown oak, as rich and visually compelling as it is, is a brittle and unforgiving wood to work with. In more practiced hands than mine, it likely is tameable. However, it constantly reminded me of how much more skilled I still hope to become.
The protruding half-blind dovetails do not offer the safety net of grain consolidation during final planing. Even the composition of the piece, asymmetric and unconventional, challenged me to create a form that moved beyond my first inclinations.
I named it "Throughsie" as there are many projecting, protruding, and intersecting elements.


Wood you be mine?

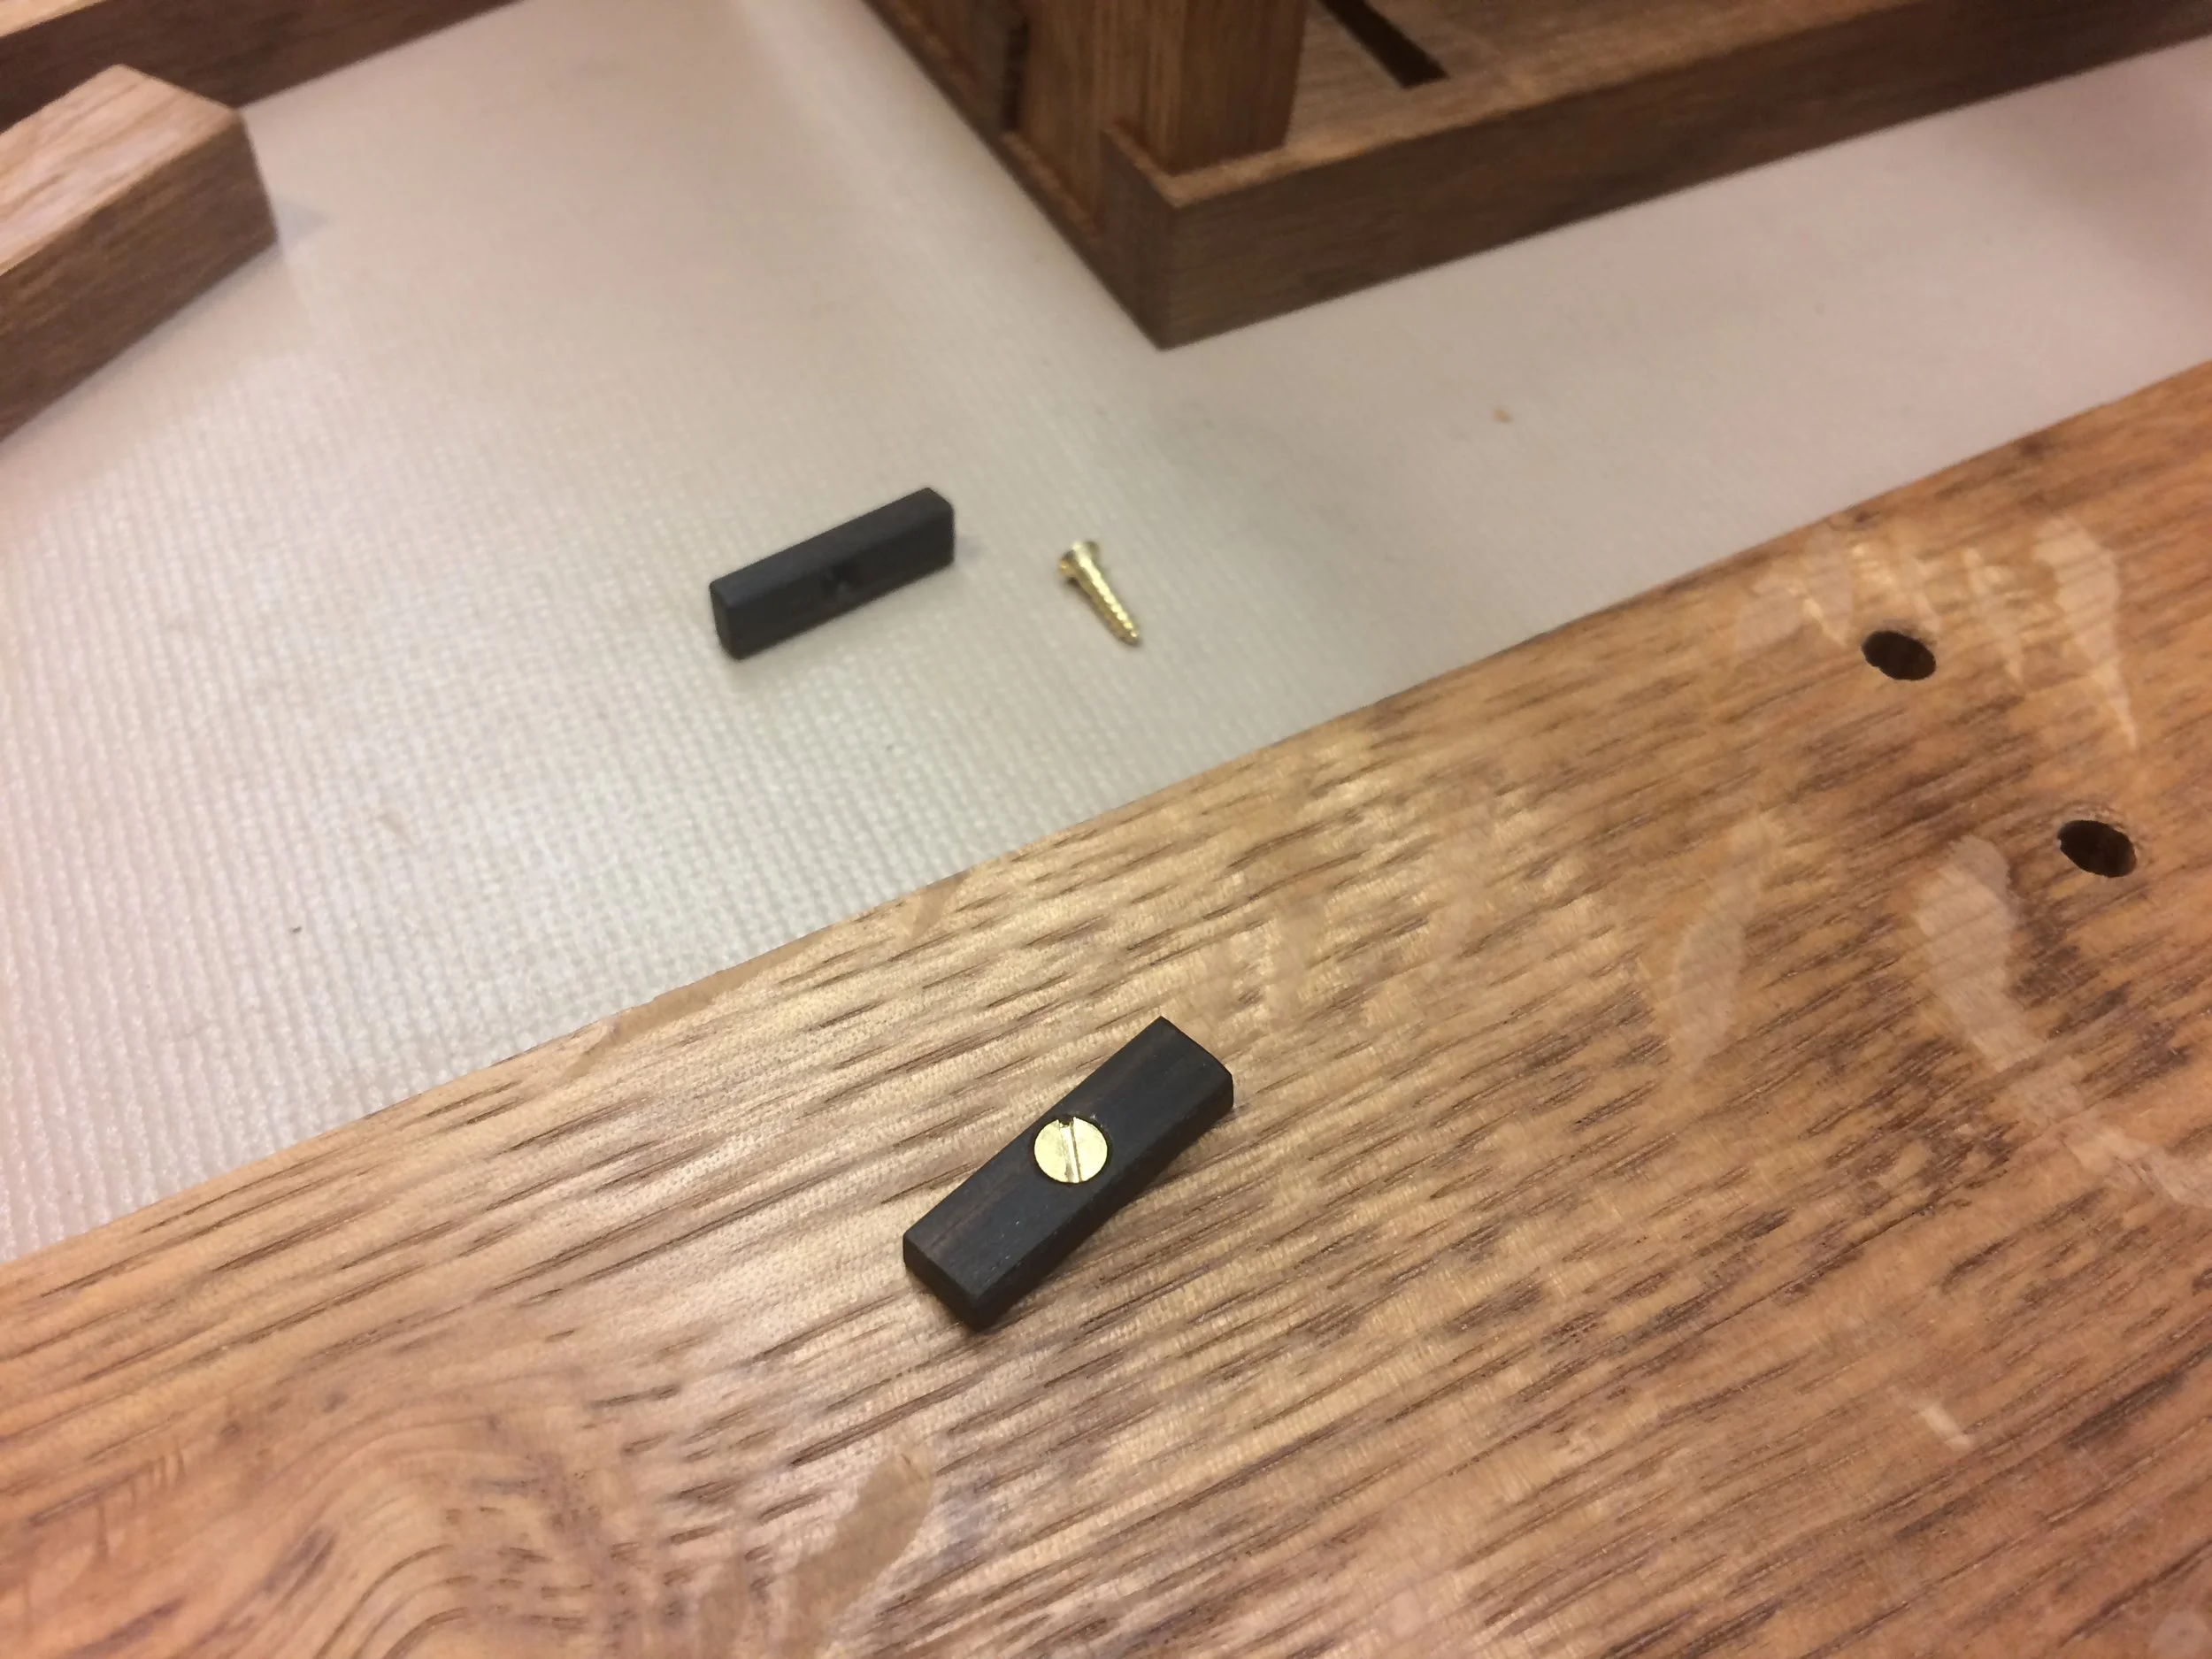
Second Project: Ebony Hardware

Chiseling out the mortise for a square pressure button.
Ebony drawer stops

Continuing the theme of squared elements, these are mortises for shelf consoles.


Some call it a flipper-flapper, here is my ebony friction latch.
Second Project: Glue Up

What really matters.
With a head down at a workbench, monastically focusing on my own development, I must not forget that there are issues much more important than craftsmanship, woodworking, or exhibitions. They are truth, equity, friends, community. Today my head is up, with so many others.

#radwomeniamfortunatetoknow
Second Project: Stock Broken Down
Brown oak for the cabinet and ash for the drawer sides and bottoms.

Mocking up an ebony door handle and how it fits into the side in a couple brown oak off-cuts.

Checking how the figure plays with adjacent pieces by dry fitting the pieces. Also, keeping things oversized for as long as possible.
Second Project: Exploring Drawer Pulls
It may be a bit early to start making drawer pulls for this project but I think pulls, knobs, and other hardware should be considered as much as any other element. Remember Walter Gropius and the Bauhaus theory of "total design"? Every component should be functional and intentionally designed to be supportive of the entire constructed piece.

Walnut and ebony pull prototypes. The upper row has hand carved dimples underneath as a little tactile surprise. I think I will go with something from the bottom row, however. The cabinet is brutal in form and a pull that is similarly planar will fit its gestalt.
Mid-Winter Show


First Project: Complete
Finished in time for Christmas, I will give these to my sister's kids (aged 2, 3, and 4) but then have to borrow them back for the upcoming Mid-Winter Show. How does one explain a furniture exhibition to a pre-schooler?


The stools are tested as the class appreciates Noam Wise's black oak cafe table.

Second Project: A Funky Little Wall Cabinet
With the stools pretty well wrapped up, it seems like a good time to work on something with right angles, dovetails, drawers, and doors.

First there was a tiny prototype, then a full-scale model.


Playing with edges that protrude proud from the front plane of the cabinet and a door pull that sticks through the side. Also, drawing with chalk to simulate a very striped piece of wood that I may select for the actual piece.
First Project: Making Progress


Full Scale Prototypes
Four sticks and a bit of cardboard, starting to get a feel for massing and the relationship between the legs and the cabinet.

Slightly more resolved.

And after taking the mockup home and trying it next to the bed, I realized it was too tall. Here it has been shortened and now I am playing with various leg shapes.
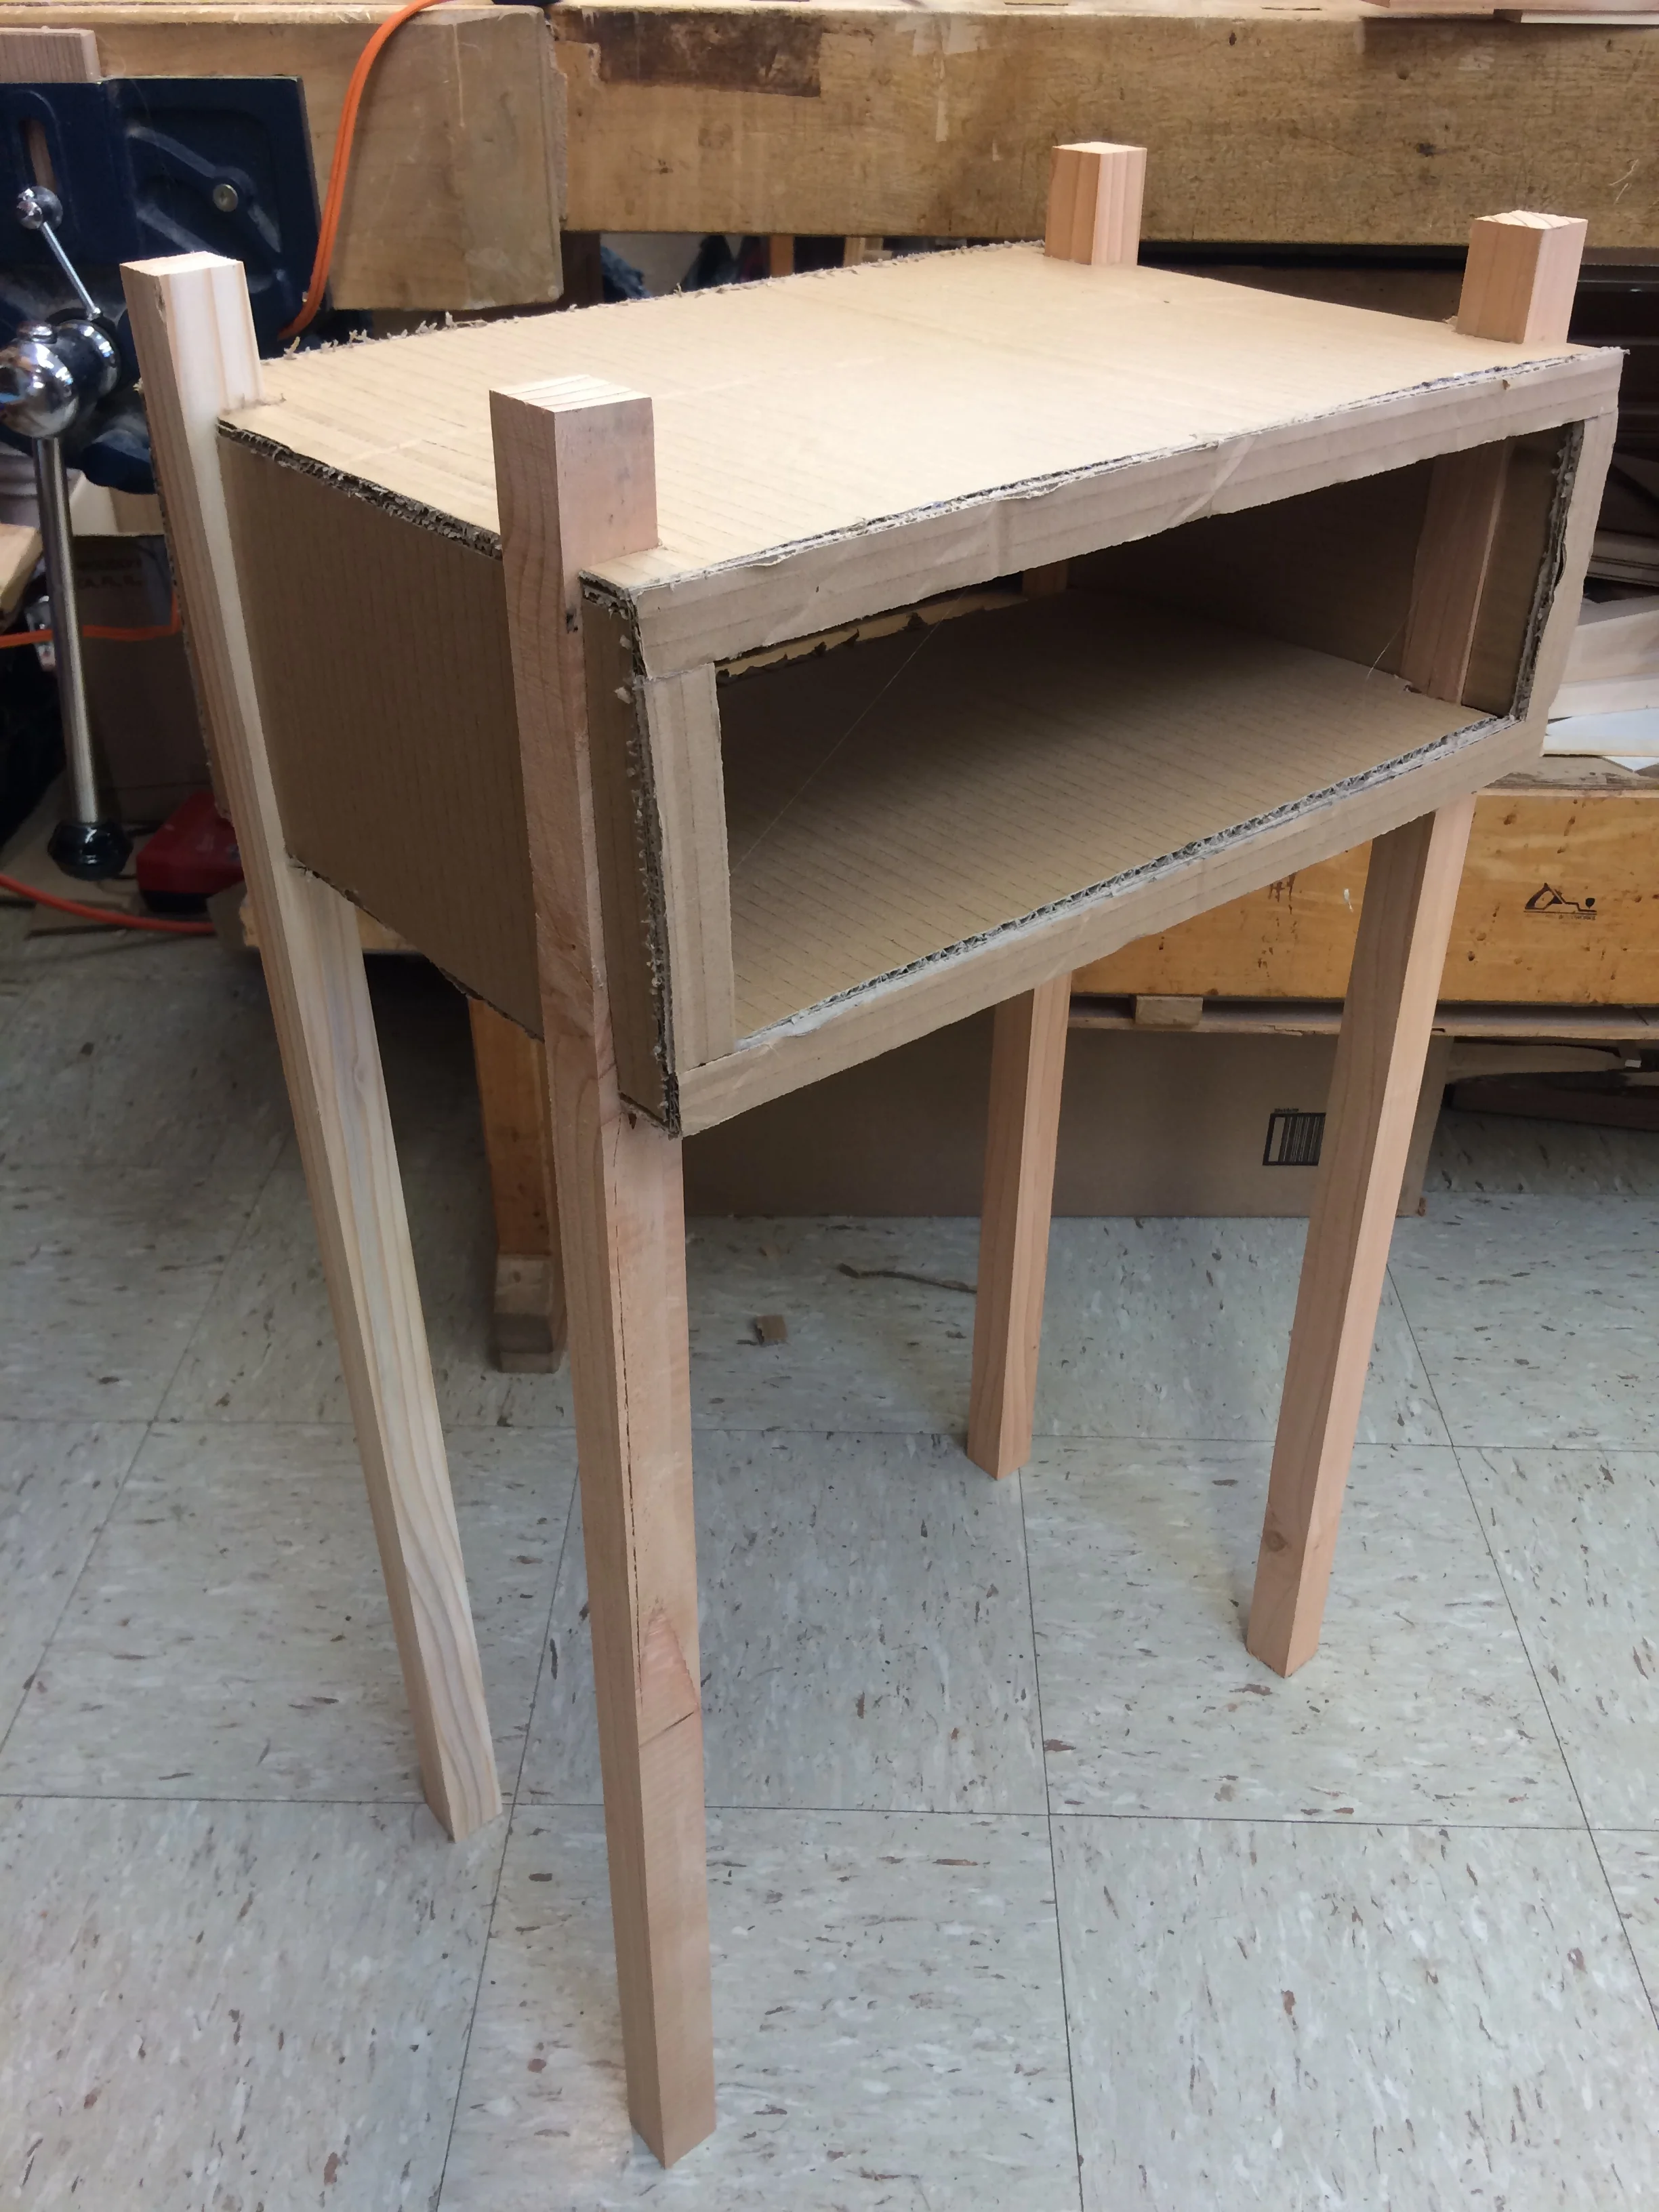
Bedside Table Prototype
I am already thinking about what to build next. Perhaps a pair of bedside tables with an open cubby, a drawer, and negative space defined by the two carcasses.


First Project: Choosing Wood

Choosing between Ash, Black Oak, Chestnut, Acacia, and Elm.

Laying out pieces in chalk after opting for a trio of American hardwoods: Ash, Black Oak, and Chestnut.
Guest Lecturer: David Welter
David presented images and stories of Jim Krenov's work. He then treated us to a surprise: an actual Krenov cabinet on a stand. It was really amazing to see it, feel it, and interact with it in person.
